How to Clean a Shower Head

Cleaning the Shower Head.
How to Clean the Shower Head
Taking a shower might be the most peaceful part of your day, it is for me.
If you are like most busy women, it’s sometimes the only time you are by yourself and no one is asking you for anything. If your shower head is dirty, it can interfere with your enjoyment of this personal time.
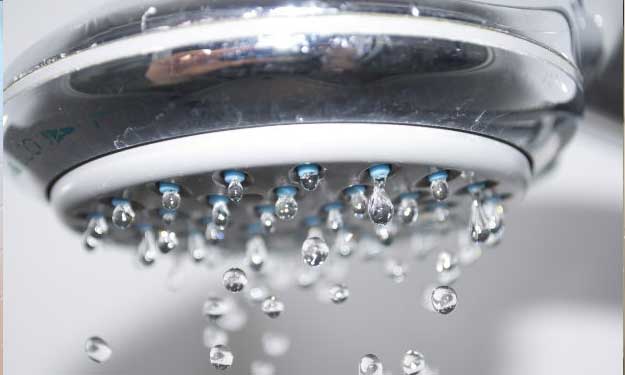
A clogged and dirty shower head can greatly reduce the amount of water that makes it through the small openings making the water pressure feel much softer. Luckily, it’s easy enough to remedy that problem and get back to long, luxurious showers with great water pressure.
How to Remove the Shower Head
Before you get started, you should know that this job is a little bit home improvement and a little bit cleaning. You need a few tools to get the work done. Don’t be intimidated, taking off the shower head is an easy task.
Tools Needed:
- Wrench or pliers
- Teflon tape
Be sure that the water is turned off completely or you might get wet when you remove the shower head.
- Remember the saying “righty tighty, lefty loosey” when removing the shower head, so you’ll be turning it left to remove it and right to reinstall it.
- Using the wrench or pliers, you have to loosen the shower head in order to remove it from the pipe.
- It’s not a bad idea to cover the metal piece with a washcloth so you don’t scratch it when you take it off.
- If you have a shower head attached to a flexible hose, remove the whole assembly to clean it thoroughly.
- Pay attention to how the whole things comes off because pretty soon, you will be putting it back together and you want to know how that works.
Removing the Gunky Buildup
There are tons of cleaners on the market that promise to remove lime scale, calcium, rust, hard water and other deposits from faucets and showers. Many deliver on their claims to clean these items, but there are things to consider.
- Using harsh chemicals in our homes might be a quick solution to getting the job done, but they can be costly when compared to household remedies and they get into our water supply.
- I’m around a lot of cleaning products and the commercial products that remove calcium, lime and rust (hard water) are incredibly toxic. They have the toxic skull and cross bones warning on them and can hurt you so severely it nearly scares me to death.
- These products are effective and they work fast, but do read all warnings, and for goodness sake, protect yourself and follow all precautions that the manufacturer recommends.
The cleaning product that you use is up to you, and a more natural approach will take a little longer, but is just as effective as harsh cleaners and won’t have a toxic effect on you or the groundwater.
If you are still not convinced that a natural cleaner can do the job, at least give it a try one time. You can always go out and spend money on those products later (but you probably won’t once you’ve seen how simple the natural way can be).
Cleaning the Shower Head with Vinegar
Once you’ve removed the showerhead, you will probably be surprised by how gross it actually looks. When you are showering, you don’t really see all the buildup on the piece because of the water coming out. A close up look shows the real story.
Here’s the natural way to get it nice and clean:
- Fill a pot with enough white vinegar to allow the shower head to float and not touch the bottom of the pan.
- Warm the vinegar slightly on the stove top.
- You can skip the warming if you’d like, it will just need to soak a little longer to remove the mineral build up.
- Immerse the shower head in the warm vinegar and allow it to soak until you see that the mineral deposits have dissipated.
- Rinse the shower head under running water, brushing any spots that may have been left behind with an old toothbrush.
- The shower head should be nice and clean within an hour or two and be ready to reinstall.
- Don’t forget to clean the mesh filter before you re-assemble the showerhead.
Putting the Shower Head Back On
Now that the shower head is clean and the water will flow freely, it’s time to reinstall it in your shower. You can just reverse the process you used to remove it before you cleaned it.
Before you put the shower head back on, wrap the Teflon tape on the pipe threads to help create a watertight seal. Using Teflon tape is optional, but I like to use it because if you have a leak at the point where the shower head attaches to the pipe, it’s kind of annoying.
Teflon tape needs to be wrapped on the pipe in the opposite direction of how the shower head will be tightened back on the pipe. Wrap the tape in a counter-clockwise direction in order for it to stay on the pipe when you turn the shower head assembly clockwise.
Keeping the Shower Head Clean
You should clean your showerhead as often as necessary, but definitely do a thorough cleaning once a year or so depending on how hard your water is.
In between full cleanings, you can fill a Ziploc bag with vinegar and attach it to the shower head without removing it. This will help keep the shower head clean and free of deposits.


