How to Clean Up Black Mold

How to Clean Up Black Mold
You probably wouldn’t be surprised to know that I am “on top” of cleaning up dirt and grime and that there are very few grimy things that ever sneak by me.
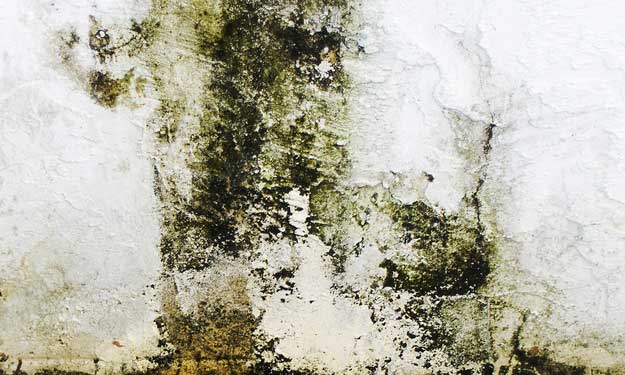
But once in a great while, I will open a cupboard (say, in the garage) and discover a small splatter of dark moldy spots starting to form.
I do not like those kinds of surprises… and I’m sure you don’t either.
My initial reaction is to run for my cleaning supplies and start scrubbing; but I know that just cleaning the mold is not enough.
There’s a larger problem, and it’s the whole reason that the black mold is there to start with- The problem is water.
You need to find where the moisture is coming from, and clean up whatever the mold is feeding on in order to remove it completely.
Can you Clean Black Mold Yourself?
I also watched the news shows and read the headlines reporting on the hazards related to the strain of black mold known as Stachybotrys chartarum or Stachybotrys atra- so I assume that some of you might be concerned that cleaning black mold is dangerous. Some people might even think it should only be removed by a cleaning professional garbed in full out hazmat suits!
The Short and Sweet Answer is YES you Can Clean Black Mold Yourself!
The Center for Disease Control and Prevention (CDC) sets out the facts on cleaning black mold very clearly:
- At present there is no test that proves an association between Stachybotrys chartarum and particular health symptoms.
- If Stachybotrys chartarum (Stachybotrys atra) or other molds are found in a building, prudent practice recommends that they be removed.
- We (CDC) do not believe that one needs to take any different precautions with Stachybotrys chartarum (Stachybotrys atra), than with other molds.
- A common-sense approach should be used for any mold contamination existing inside buildings and homes.
I just love common sense, don’t you?
But be aware that all molds; whether black, green, pink, orange or red can potentially cause cold or hay fever symptoms in healthy people and can aggravate symptoms in those with compromised immune systems, or people with breathing issues.
Where’s the WATER?
You should trust your nose. If you smell a musty or mildewy odor there is a moisture problem even if you can’t initially find it.
Start by checking for any kind of water leaks and inspect high moisture areas. You can hire a professional or get out your trusty flashlight and act like a CSI investigator.
- Check behind the toilets, under the sinks and by the hot water heater.
- If your refrigerator has a water or ice dispenser, check behind it and check the floor underneath it. Make sure the drip pan is dry.
- Carefully inspect the shower tile and grout. If there is mold on the tiles, be sure that the grout does not have any cracks or is missing in any places. That would be a good indication that there is probably mold behind the tiles too.
- Check your laundry area. Inspect the washer hoses and make sure that your dryer is properly vented to the outside otherwise you will have moisture issues.
- Window air conditioning units can be a big problem because sometimes the water drips and drains between the inside and outside walls of the house. If you have a window unit, inspect it regularly. Make sure that it is not leaking and the drip pan is emptied often.
- Roof leaks are notorious for causing mold problems. This can be due to an old/rotted roof, lifted tiles, old gutters, leaky skylight, moss build up (which also lifts the tiles), storm damage that goes unnoticed and many other issues. These not only lead to mold in the ceiling, but mold can grow between the walls also.
Fix the Cause of Excess Moisture
Eliminate moisture, eliminate mold. Mold NEEDS moisture and without it, it can’t survive.
Okay, so you’ve found the source of the moisture, now you need to fix it. Mold will just keep coming back unless the source of moisture infiltration is stopped.
Fix all moisture problems first in order to stop black mold from coming back for good!
Cleaning and Removing Black Mold
Now that you have located the mold and remedied the moisture problem, it is time to clean it up and eliminate it.
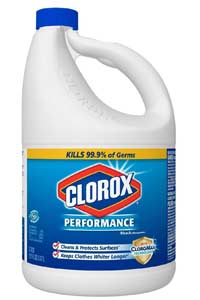
For this, you can run to the store and purchase an expensive commercial product or you can use inexpensive chlorine bleach that you probably already have on hand. Bleach it is a great choice for non-porous surfaces such as tiles, floors, and glass or other areas where you are not concerned with color-fastness, fading or damage that bleach can cause to some surfaces.
You can also clean black mold with soap and water, borax or vinegar.
Chlorine Bleach
 Be sure to ventilate the area well, open the windows and turn on any fan to get the air moving.
Assemble your Tools:
- Rubber gloves
- Eye goggles
- Regular sponge
- Green scrubby
Mix your Cleaner:
- 1 cup of bleach
- 1 gallon of water
- 2 Tbsp. Non-ammonia liquid laundry soap
Start Cleaning:
- Using a sponge or a spray bottle, moisten the area by applying the solution to the affected area.
- Let the bleach solution sit for about 5-10 minutes so the bleach can do its magic.
- Don your rubber gloves, goggles and grab the scrubby pad.
- Now is the time to use your elbow grease and scrub the area. Keep working on the mold until there is no surface mold present that you can feel.
- If any black or greenish staining remains, spray the area again and let the bleach sit for another 10 minutes.
- Rinse the area completely with clean warm water to remove all remaining traces of bleach.
- Let the area dry completely. Use a fan to speed up the process if needed.
Borax
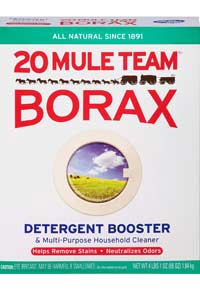
 Borax is another good alternative to expensive commercial products. Borax will not bleach away mold stains like chlorine bleach does, but it’s a natural mineral and will inhibit future mold regrowth.
Mix your Cleaner:
- 1 cup of borax
- 1 gallon of water
- 2 Tbsp. Mild dishwashing liquid (like Dawn).
Start Cleaning:
- Using a scrub brush or scrubbing pad, apply the borax solution to the area and scrub to remove visible mold.
- Rinse thoroughly to remove mold.
- If the material type permits, you can leave the borax cleaning solution on the area and allow it to dry to prevent mold from regrowing.
- Let the area dry completely.
Vinegar
 Vinegar is a great cleaner if you are working in a poorly ventilated area as it does not produce hazardous fumes like bleach will.
Mix your Cleaner:
- 2 quarts plain white vinegar
- 2 quarts warm water
- 2 Tbsp. Mild dishwashing liquid (like Dawn).
Start Cleaning:
- Apply the vinegar to the affected area using a sponge or pouring some vinegar into a plastic spray bottle and spraying the entire surface.
- Allow the vinegar cleaner to sit for 5-10 minutes.
- Using a scrub brush or scrubbing pad, scrub to remove visible mold.
- Rinse completely and allow the surface to dry.
If there is a stain left from the mold, don’t fret. We’ll discuss how to deal with it below.
Heavy Duty Stains
So you’ve killed the spores and dried the surface completely; now you are left with a stain, watermark or darkened area. I know you are tempted to slap a coat of paint on the area now, but resist. I assure you (through personal experience) that the odds will not be in your favor and the stain will bleed back through.
The best way to remedy this situation is with a primer/sealer. I use a popular product called Kilz whenever this issue has come up. It will stop the stain from bleeding through and get rid of any odor or musty smell that is still lingering.
You can use both any of the mold killing solutions as well as the sealer/primer on brick, masonry, ceramic tile, drywall, plaster, stucco wood and metal surfaces.
Preventative Maintenance
After all this work, you want to make sure that you are done with mold once and for all. Although nothing is 100% guaranteed, you can definitely increase your odds by doing the following:
Reduce Air Humidity
A dehumidifier is essential to drying out the house. A damp house is a breeding ground for mold and mildew. Dehumidifiers can be purchased rather affordably at almost any home supply store.
They are very effective at reducing the moisture in your environment. Another tip is to be sure to empty the receptacle as recommended or the moisture it takes out of the air can overflow on to your floor and that won’t help your mold problem at all. The other reason to empty the tray is so that mold and mildew will not build up in it as well.
Filter the Air
An air filtration unit will assist in trapping the nasty spores that are in the air. This will limit the odds of them landing on a surface and growing into a full blown mold problem.
Many equipment rental shops carry portable filtration systems. Renting a unit might be more cost effective for you, especially if the issue is something you know is fixed and your house usually has a low humidity level. This way you can also “try it before you buy it” to see how well it works and if it is something you want to invest in.
Increase Air Circulation
Kind of seems like a redundant topic after the dehumidifier and air filtration system, doesn’t it? Well, what most people don’t think about is that these tools cannot do their job if rooms are cluttered. This is especially true for basements, attics and garages.
Make sure that you don’t have “stuff” stacked against outside walls or any wall for that matter. Leave about an inch for airflow. This is critical in areas and rooms that are small or where doors are closed most of the time such as closets.
Another thing to consider is your headboard. A headboard against outside walls can be a breeding ground for mold! If you think about sleeping 8 hours with that right at your head…you will want to make sure to check behind it and move it away from the wall to make sure there is plenty of air flow.
When to Call a Professional
If you notice a moldy smell that will not go away or the mold continues to return even after fixing a leak and limiting moisture, it is wise to contact a professional. They have tools and the knowledge to find water leaks that cause mold behind sheet rock, paneling, wallpaper and in areas that are not visible to the homeowner.
Now that wasn’t so hard now, was it? No mold is good mold when it comes to cleaning. But now you know all the tricks and cleaning tips that professional cleaners use to clean it up fast.


